Merry Christmas! It appears that attempting to start a regular blog at the end of the semester was a bad idea. Just as I set up the blog, I discovered it was crunch time for applications to graduate school (architecture). Deadlines for my art also started to come into view, and so since then the intensity of work has increased steadily. I need a holiday (good timing!). Very good things have happened though. Applications are mostly done, and there is only a little printing between me and my first show as an apprentice. Good thing, because the show, dubbed “Processed”, opens January 7th—five days after I get back from break.

Promotional poster for St. Olaf apprentices' January show.
Though I’ve been through many steps since my last post about the bronze pour, I’d like to focus on one of my favorites, which happened a couple weeks ago (Alas, I do not have pictures from the pour yet, so that will have to wait). The pour left me with a rough cube of bronze, a bit textured from the shell, and with a few nails still embedded. The first step was to clean it all up using pneumatic grinders and polishers. I drilled out the nails, which had been used for structural support during the pour, and filled the holes with bronze using an arc welder (great fun!). During this process I found out that substantial parts of one face of the cube had pockets of empty space lurking just beneath the surface. I filled those as best I could with the welder, though one face still has a preponderance of pock-marks (more on that later).

The cube: starting to draw on a line in acid-proof resist
The softest polishing pad on the pneumatic grinder has a consistency of a soft scotch-brite pad. Surprisingly, on the end of a drill spinning 30,000 times a minute, that pad can put a nice gouge in solid bronze. Used a little more carefully, though, it gives a nice smooth finish, like fine sandpaper. After that I moved to hand tools—very fine emery paper with a little oil, compressed drawing charcoal, and finally a compound for polishing silver, which gives the bronze a mirror-like depth.
All of the above, a few hours, and a lot of elbow grease gave me a very elemental-looking platonic solid. At this point I was sorely tempted to call myself a mathematical Brâncuşi, put it on a pedestal, and title it “Cube.” Maybe it shows my eccentricity, but I find pure, simple shapes very satisfying.
The photo to the right shows the cube with the start of the next step as well. This is where it really gets interesting. Up to this point (to recap: make cube out of wax, make shell around wax, melt out wax, pour in bronze, polish bronze) the process has been relatively standard. Sculptors have been casting in bronze for centuries—I just had to figure out how to make a precise shape with hard edges.

"A" is the block, in this case one face of the cube, "B" is the paper. The black bars are ink (image from wikipedia).
To my knowledge, though, no one has done this next part (I admit, my knowledge is not comprehensive). The idea was to create a relief sculpture on each side, just like a woodcut except in bronze. Then I can cover the surface with ink, press a piece of paper onto the bronze, and all of the high areas will transfer ink onto the paper.
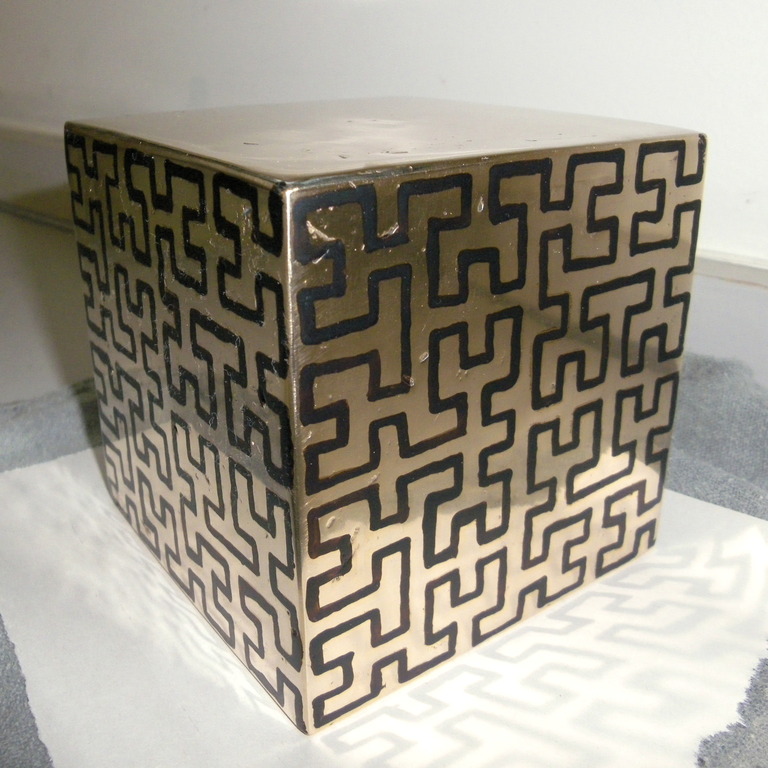
To do this in wood I would find a piece of plywood, grab a chisel and hammer, and start hammering away. That won’t get me very far in bronze, despite it being a very soft metal. What can take advantage of that softness, though, is acid. This is a common technique in printmaking, where acid is used to eat away parts of a metal plate to create texture which holds ink. To keep the acid from eating away everything and just making a smaller cube, I painted parts of the surface with varnish, which acts as a resist, keeping the acid away from that part of the cube. Now I’m opening a whole new can of processes, which I’d rather leave for next time, along with an explanation of the designs on the cube. For now, though, here’s a more recent photo of the final cube, showing all of the beautiful texture created by letting the bronze sit in acid for sixteen hours.

The final cube, with blue ink rolled on top, about to be printed. Test prints in the background.
Have a Merry Christmas! See you in the new year.
Now I get it. I love the picture of the finished cube. But I also appreciate the 1000 words that accompany the image.